hair

Makeup Tutorial: Green and Gold


So a few people have asked me to do a makeup tutorial, for blending in particular. Before I start, I'll point out that I'm not a professional makeup artist, so my techniques may not be the "proper" way, but I've been asked to show how I do it. If you'd like to know how makeup artists do it, you can probably find dozens of tutorials on Youtube.


The makeup I used for this look, not including my foundation and contouring. 

Before you begin, make sure you've moisturised your skin. Some people choose to do their eye makeup before their foundation (to avoid a mess), but I always do my foundation first. Before I put on my foundation I used a primer; in this case I used Too Faced Shadow Insurance in Candlelight, which has a nice gold sheen.

To begin your blending, use the lightest colour first, which should sit on your brow bone. I use a fairly large brush for this. Goldilux from Sugarpill is my saviour.


Choose your main colour for your eyes; I'm doing a green and gold look, so I've gone for the Forest Green on my Crown Brush palette. If you want a strong look like mine, choose a strong colour (like a red, or a blue), but you could also recreate this technique with neutral colours like browns or greys for a smokey eye look.

Using a slightly smaller brush, pull the colour into the crease of your eye, rounding underneath the eye. Make sure you get the pigment strong in the crease of your eye (don't worry about being neat right now).


Either use another brush (I used the other end of my brush, which was a much smaller brush-head) or your fingertip (clean, obviously!) to smudge the pigment up into the gold. I drew the green up and out into a wing as this suits my eye-shape; you might want to keep to a rounded shape, if you prefer. Experiment with which shapes suit your eyes.

You can also use a lighter green colour to help blend the colours together.


Use a black pigment in the crease of the eye, using the same technique as above to blend the edges into the green pigment. Keep your eyelid clear of colour for now.


Use the gold pigment on the eyelid to make it pop. My eyes are quite squinty (although I do play that up by having such heavy makeup on the top of the eye rather than underneath) so to help open them up, I always put the lighter pigment into the bottom corner of my eyes. 

Line your lower lid with black kohl eyeliner (I use Maybelline Expert Eyes pencil liner) and use mascara on the top and bottom lashes (at the moment I'm using Maybelline's Great Lash)
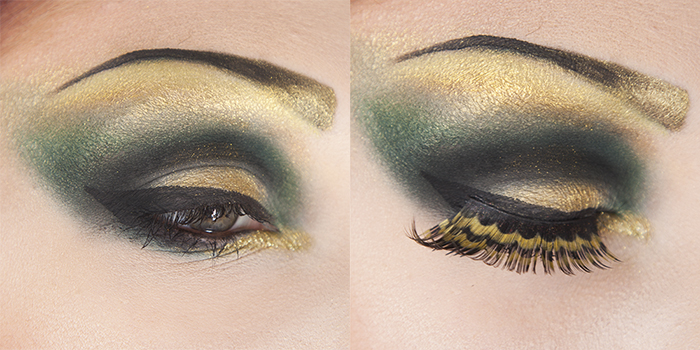
 

Finish off your look with liquid liner on the top eyelid (I swear by Collection 2000 Fast Stroke), keeping the line thin in the corner of the eye, and thicker towards the middle and edge. I create a wing shape to echo the green and black. 

I also add some extra sparkle using gold glitter, and ombre gold-black eyebrows (I don't have a tutorial for these, because Mathu Anderson's tutorial is so on point). If you want a more over the top look, choose some big lashes. I found these amazing gold and black ones on Boohoo.com (unfortunately no longer available, but these lashes from Sugarpill also look amazing) - I've cut them down slightly to fit my eye, which gave me an extra piece to place in the bottom corner of my eye.

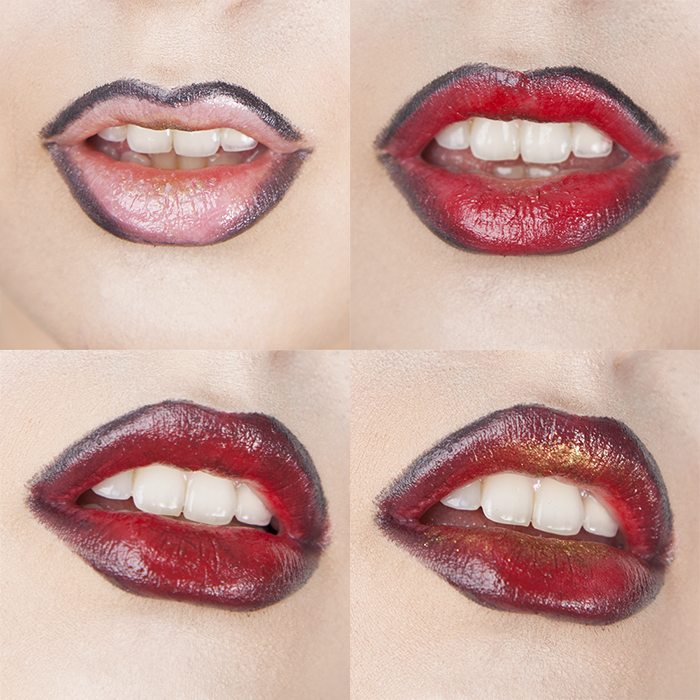
 

Lips! I can never understand WHY some people don't blend their lipstick like they would their eye makeup. I keep seeing dark lipliner and light lipstick which hasn't been blended together, creating a look that's only fit for a halloween costume ;)

For full, 3D lip realness, moisturise your lips before you begin, then line with a dark lip liner. If the shape isn't completely perfect, you can always fix it as you go. Fill the middle of your lips with your chosen lipstick (I used Rimmel Lasting Finish in Alarm). Now, using your lipliner, blend in the edges into the lipstick (just imagine how you would shade a pencil drawing). To finish off, use your gold pigment to dab in the middle of both the top and bottom lips. 

Voila!

I hope this tutorial helps; I'd love to see the looks you create so feel free to post a link to photos in the comments.


Check out my new wig! I just got this from Geisha Wigs, and this is what it looked like before:
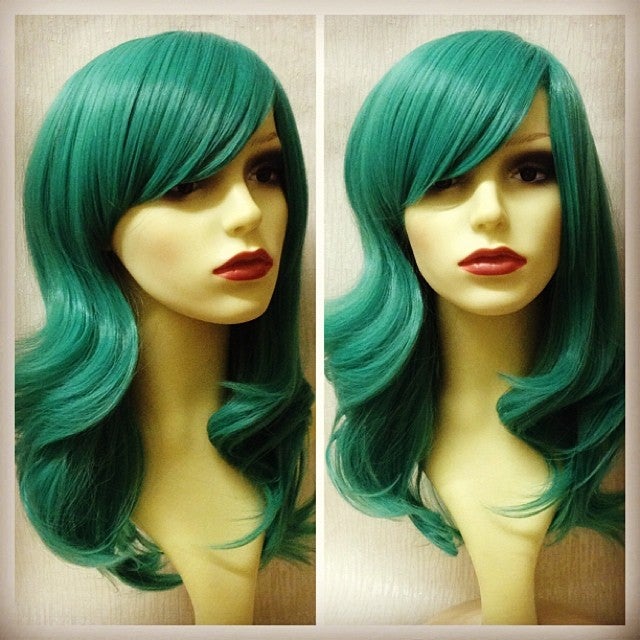
10 minutes of styling, this is what it looked like after.

Thank you, Mama. 

This Month In Pictures

What I've been up to during the past month, via my instagram @swiczeniuk!


Top Left - This weekend The Roustabouts performed at The Crazy Bear in Stadhampton, which is a beautiful venue! I wanted to take a photo of the amazing garden but didn't get a chance. I just bought this dress though, so here's a snap of what I wore!

Top Right - Bling bling just before Soho House

Bottom Left - A WIWT from last week, wearing my Whistle & Wolf pleated dress.

Bottom Right - The Roustabouts just before our gig at Hoxley & Porter in Upper Street


I've been SO busy from the beginning of the year! As my job involves selling our lingerie to stockists, this means I've started to go to tradeshows, which tend to happen at the beginning of the year and the middle of the year. In late January we went to Paris and then Copenhagen. You can read an indepth diary of the two tradeshows on the Playful Promises blog, but here's a few instagram snaps.

Copenhagen (above) was absolutely lovely, but snowy and cold! I think we might have been unlucky with the weather as some people told us it wasn't usually that snowy. It's such a lovely city though, and I'd love to go back in the Summer. The food was completely amazing (but everything is so expensive!).


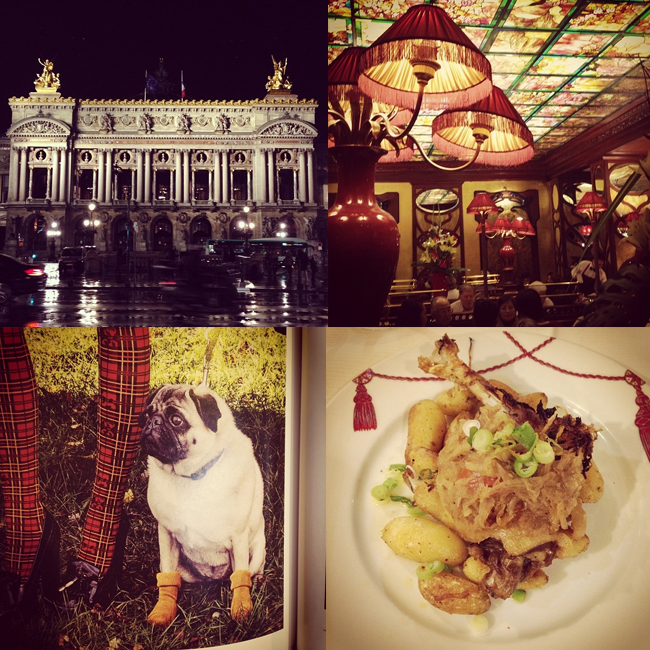
Paris was also beautiful (and a much better show than Copenhagen). We didn't have much time to explore as the show was from 9-7pm and quite exhausting. We did manage to go to a gorgeous art nouveau restaurant (top right) with Karolina Laskowska, which was near the opera house (top left). Another highlight was finding a picture of a pug in socks. A PUG IN SOCKS!


Top Row - Went out to see The Black Cat at the Cafe Royal. This place is covered in gilt gold, which is obviously to my tastes ;) 

Bottom Row - For New Years Eve we performed at the Gore Hotel for an event organised by Chaz Royal and Betty D'Light. It was a masquerade themed event, so I found us some matching masquerade masks. 

This Month In Pictures

What I've been up to during the past month, via my instagram @swiczeniuk!


Top Left: This Sunday we went off to a BBQ for our friend Anthony's birthday, so I tried something a little different with my hair. It was such a lovely day, with great company, talking about everything from feminist issues to the next Doctor Who. Unfortunately the mosquitos seemed to enjoy my flesh, as my legs have been bitten to shreds :(

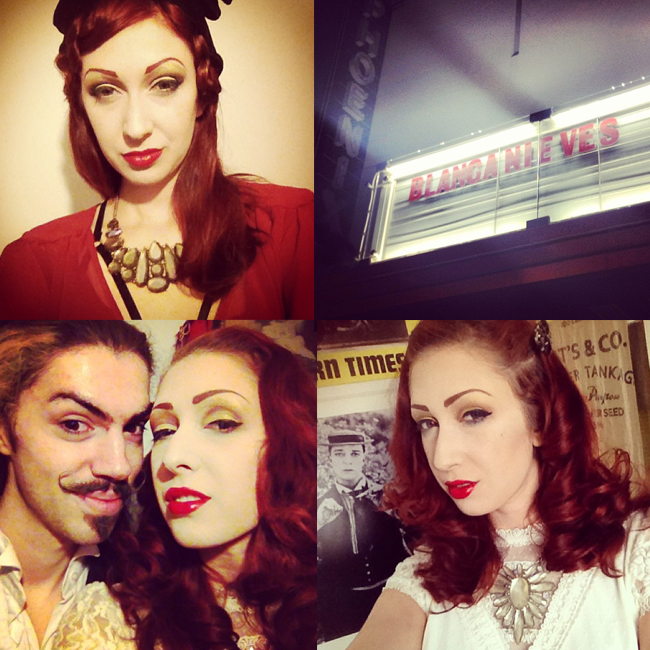
Other images: On Saturday we had our first night off for 10 months, now that The Burning Beat is NO LONGER at House of Wolf (we will be doing a Bank Holiday special in Shoreditch on the 25th August)! It was also quite a coincidence that my Grandmother was celebrating her 90th birthday and Mark and I were celebrating our 4 year anniversary. For lunch we went to see my family, which was quite a large gathering with plenty of booze. 

For the evening I'd booked a trip to the beautiful Pheonix Cinema to see Blancanieves. I'm going to have to give this a separate post because it was just absolutely beautiful and exactly what we love!


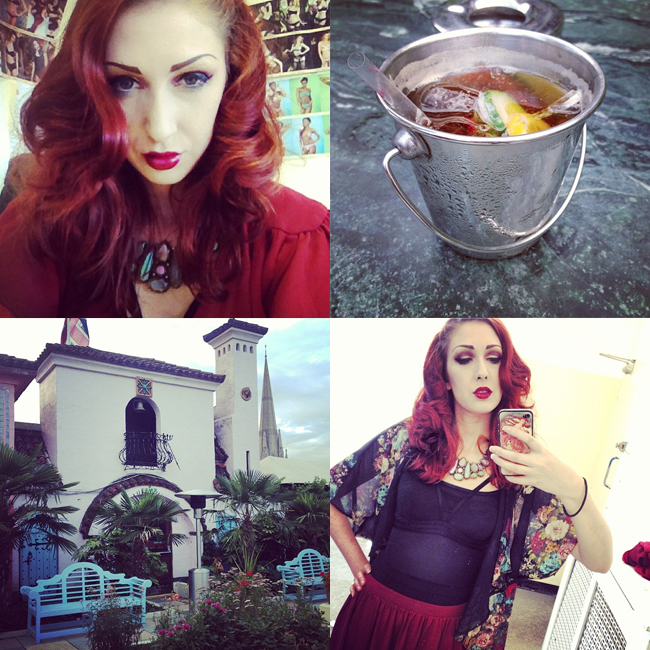
Top Left: Selfie at work! You can see how my desk is surrounded by images..

Top Right: One of the ladies at work was leaving, so we went for a goodbye BBQ at Kensington Roof Gardens. They had Pimms in TINY BUCKETS IT WAS GREAT.

Bottom Left: It also looked amazing. You wouldn't think that such an exotic looking place was in the middle of London. And it was an authentic kind of exotic rather than looking theme park-esque.

Bottom Right: Wearing my new Playful Promises Hella Bodysuit with a Karolina Laskowska frame bra. I've been pretty much wearing this bra under and over things for the past week.


Top Left: A backstage selfie at the last Burning Beat at House of Wolf. I'm wearing my new Nearer the Moon fringe dress.

Top Right: We also had a private birthday party booking just before The Burning Beat. It was a gatsby inspired event with cocktails in teacups and lots of people looking very dashing!

Bottom Left: For the first time ever, our dj booth was a white grand piano. Badass.

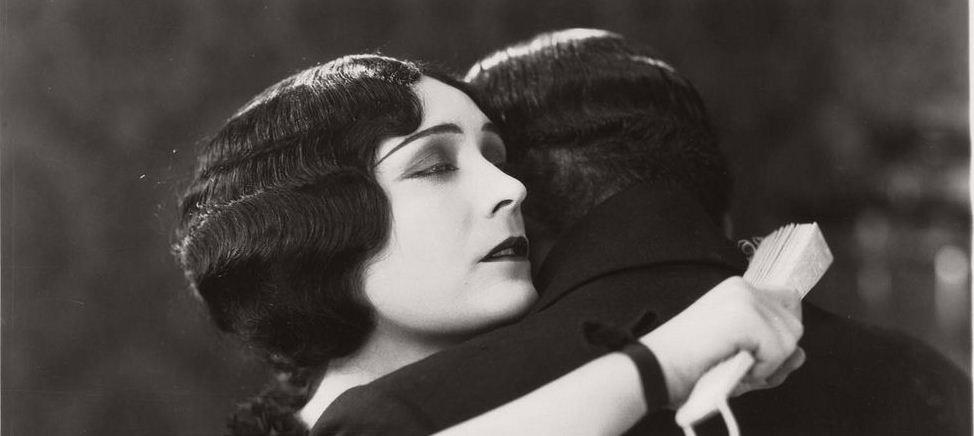
Bottom Right: Before heading out to a Gatsby themed party at Soho House, where we were performing. I tried to do a Pola Negri type makeup look... Although the eyebrows need work. Anyone want to see a tutorial of this?


Wig stylin'

As a follow up to my previous post on wig advice, I've put together a few ideas about styling wigs.

One of the biggest mistakes I see people make, even when they have bought a decent-quality wig, is just wearing it straight from the packaging. In my opinion, a wig should not be an obvious giveaway. No matter how outrageous the colour, you can still make it work like your natural hair!

For example, I've recently purchased this wig and haven't styled it yet. It probably isn't the best example as the wig itself is fantastic quality, with a fairly good fake parting. However, here you can see how it is styled straight out of the box:


Eek - no eyes!

There are two ways you can deal with the super-long-fringe-of-doom (you do not push the wig back so the crown sits on top of your head and you do not leave the fringe as is and blink your way through) you can either push it to one side so it is flipped across your forehead: 


 This way it is always best to either pin it into place or cut the fringe into a slant. If you are going to go down this route, I always find it looks more realistic if you wear the wig at a slight angle, as if the parting is a side parting. 

 To cover the giveaway fake parting, hats, hairpieces and hair clips are your friend!

Or you can just shorten the fringe by cutting it straight across (or asymmetrical or even in a widow's peak if you prefer!). I have found the best way to ensure a straight fringe is to cut it while the wig is on. If you are not used to cutting your own fringe then start out slowly, only taking half an inch off and try to even it out as much as possible. Here I have also cut a little piece for the side of my face, to draw attention to my fake cheekbones!


A straight fringe frames my face just the way I want

 Of course, some wigs may require a bit more styling than this one, which already has a great volume and length. Sometimes you may need to do a bit of reconstructive surgery on a particularly bad wig; always helpful if you have a friend with hair skills! 

The only thing that is left is to experiment with the wig as if it were your own hair. Try up-dos, braiding, plaiting, victory curls, finger waves, mixing in coloured extensions..... some wigs are even heat-resistant and will allow you to curl or straighten them. I always like to have long wigs up off my neck, and use the length to clip up onto one side, like this:


Capt. Swiczeniuk signing off!